| Roy's
Boler Blog |
Fiberglass
Trailer Hats |
|||
 |
|
 |
 |
 |
| "Arriving home a diamond in the rough" |
||||
| |
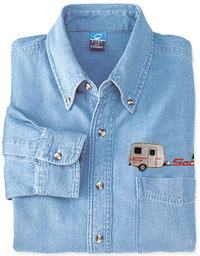
New trailer
embroidered shirts |
Boler\fiberglass
RV links |
||||
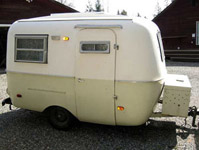
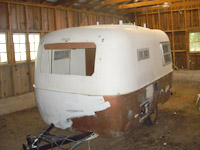
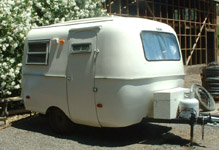
After seeing the Fiberglass RV web sight pop up on my email the other day I decided to take a look back at a time when I became fascinated by Boler Trailers and I started my Boler blog.
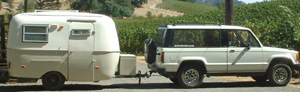
That fascination started back in 2005 when I wanted a way to attend Burning man in the Nevada desert more comfortably. My first trip there taught me about the playa and how dusty things can be when your camping in a tent. I found a used Boler up in Washington state and the adventure began. My first restoration gave me some wonderful years in style and much grater comfort out the out on the desert.
A few years later the elders in my life got to the point where they needed full time care to enjoy their last years in their home. So my Burning man days ended in 2013 after 13 amazing years. The Boler got parked and became a full time caregiver. That was one of the best decisions of my life. We had some amazing experiences together over those years and I learned a lot. Dorothy passed away in the end of 2018 but made it to live past her 104th birthday!
Unfortunately two months later the Kincade fire here in California hit my property and damaged the Boler (you can see the damage in the 1-13-2021 post below) Greatfully the house was able to be saved. I had installed a sprinkler system on my roof and a generator that kept the well pumping that kept it 15 feet away.
I have the time and freedom now to get back to my Boler and see if I can restore her again. I learned a lot the first time so it should be a lot easier this time around. I hope to update this as I go.
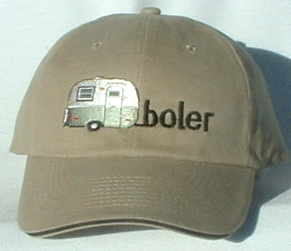
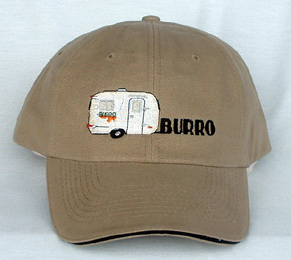
Before I retired I had an embroidery company so made so items with featuring our trailers you can see above. That was a fun project and kept me a little involved with the community off and on. I made them to each order and still have the ability. So can if anyone is interested.
Here is restoration of my Boler from my original bog
| 2-28-2005 |
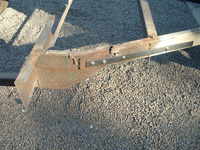
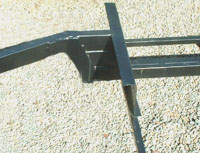
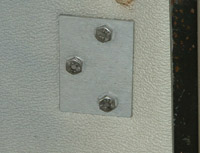
My first trip out was just after purchasing her. On the trip to Burning Man
the frame broke!
The guy camping next to me was a welder and we were able to borrow a arc welder
from one of the metal artists that he use to patch me up enough to get out
of the desert and to the Home Depot in Sparks Nevada before the weakest weld
broke loose. I purchased some steel, a drill, nuts & bolts and got it
patched enough to make it down the Sierras and home. Great thanks to the manager
at Home Depot for the use of their power and extension cord.
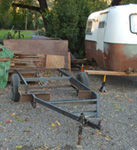
Want her to last so ordered a new frame from a local welder...
before removing frame |
one side of frame damage the other side just as bad |
new frame before powder coating |
 |
 |
 |
box contains batteries and inverter
for solar system |
(repair made in Home Depot parking
lot to get it home) |
ugly house paint scraped off bottom
of body |
| 3-31-2005 |
Good news!
When I separated the frame from the body the fiberglass went back to original
shape!
Should make repairs to where the closet wall had buckled inside easy.
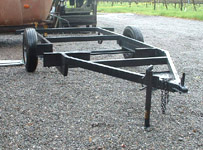
Frame Back from the Powder coater!
It's beautiful... |
and stronger too... | dropped right down into
place! |
 |
|
 |
| Latest changes 4-15-2005 |
In the mean time thought I would install new hinges I purchased from
Scamp and re-hang the door.
I wanted to try and remove a gap at the bottom that was created
when the frame cracked.
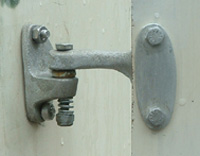
I removed and re-shaped the chrome vertical door support* on the front inside
(put it in a vise and straightened it)
That did the trick, when I put it back it removed the bulge and the door fit
again.
 |
|
 |
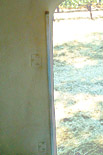 |
plate inside hinge body side |
plate inside door |
re-position hinges |
*door support |
| Latest changes 4-30-2005 |
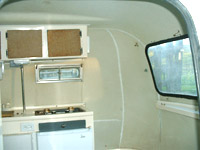
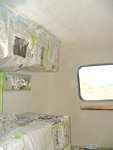
& now on to the interior ...
 |
|
|
 |
|
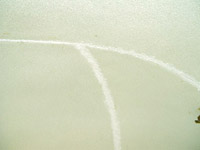
Removed the tape and caulking the seams... |
try to textured the caulk to match but not happy with it |
So....... Scrub with TSP & spray with primer |
Then re-texture the ensulite before painting |
New Texture |

| Latest changes 6-16-2005 |
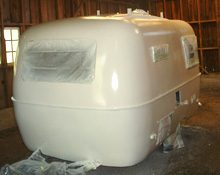
I wanted to stay with Gel coat for the exterior finish
of my Boler instead of using auto paint. Not easy but neither is a good auto
paint job (why they run a couple of grand$). The problems I saw with Gel coat
were, It is designed to be sprayed into a mould and covered with other products
- it does not self level like a paint and needs to be sealed off from the
air to fully cure. I had done some small repairs on the interior gel coat with
a gravity feed spray gun and regular gel coat I purchased from Tap Plastics.
After mixing pigments to get the right color and adding a curing agent I was
able to mask off the areas - spray - and the sand and polish to blend in after
it cured. You have a limited time to spray and clean the gun before the gel coat
starts to cure. This technique would not work for the outside of the whole
trailer!
I thought I had found a way to make the job work/easier when I found
a spray gun that mixed the catalyst as you sprayed. Well - luckily I called
the gun manufacturer with a question and owner of the company answered the
phone. He said the spray gun that mixes the catalyst as you spray would not
be the right tool for my job. Since I had not used he exchanged it for a different
one he makes that should do the job. (cost $100 less too) Unlike other gravity
feed guns theirs does not use a needle in the tip making it much easier to
clean between batches and uses disposable paper cups to hold the gel coat so
you don't have to clean them. I will still need to mix about a quart of gel coat
- spray it -and clean the gun but this should make that a reasonable process.
I figure it is going to take about 5 gallons of gel coat to redo the exterior.
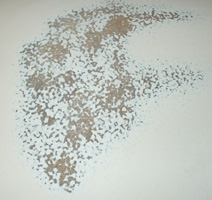
Some of the surface cracks in the original gel coat from the frame break are shallow and numerous over a large area that wouldn't make sense to gouge out and fill. Thankfully the fiberglass under the Gel coat is still in good shape. So I am going to sand those areas down and coat with a polyester surface primer "Duratec surface Primer 707-002" before Gel coating the whole trailer. There are only a couple of cracks big enough to gouge and fill so will do that to those.
To handle the open air curing problem Duratec makes a high gloss additive for their gel coat that allows it to cure in the open air. The folks at Revchem Plastics where I am buying all this have been great! Amazing customer service - they even mixed the additive and gel coat to match the color of my Isuzu tow vehicle.
So I have pulled the front and back windows along
with the tail and running light covers. Going to leave the side windows in
and mask them off since they don't leak. Then I wiped the
body down with Transtar Scat de greaser so I can start the sanding and priming.........
 |
 |
pulled front & back
windows gel coat test |
shallow surface cracks to sand and prime |
| Latest changes 7-04-2005 |
Working on the exterior - masked off the side windows, frame etc, and started
sanding the areas that need repair.
Posting these photos so I can get coaching on how best to proceed. I have
taken down the gel coat to the fiberglass and can still see the cracks a little
and not sure if I need to go into the glass and re-glass....
Hope not done that and it's a lot of work :-(
The question is will the primer work to keep the cracks from re-appearing
in the new gel coat???
Will call the expert where I purchased the spray gun tomorrow.........
|
 |
|
|
| cracks in the gel coat after the frame break | sanded through the gel coat to the glass |
small spider cracks |
| Latest changes 7-06-2005 |
Got the areas that needed it primed and sanded today.
First time doing this type of work and realize why good body work is so expensive
;-)
Then sanded the whole body so that I can spray the gel coat tomorrow morning!
 |
 |
sprayed a heavy coat of primer |
the sanded smooth |
| Latest changes 7-07-2005 |
Like they say the best laid plans don't always work... Had to wipe off a section in the back where "whatever" the previous owner had used as a primer for his house paint, started to react to the gel coat :-(.... Though I had gotten it all. Since it was a hot morning things were setting up pretty fast I was able to sand and feather it out and re-spray that section. Had to go a little heavy there so a couple of runs but since it is gel coat I should be able to sand those out once it fully cures.
Looking pretty good but some "orange peel" texture. That was to be expected and can be sanded/polished later on. Amazing how much better she looks all one color! The gel coat I used has a component to make it fully cure in the open air, seem to be working. (never used it before) Only used 1/2 of the 5 gal I purchased.
| Latest changes 7-19-2005 |
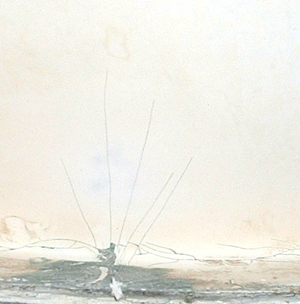
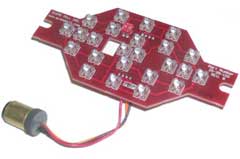
Back from the Fiberglass RV gathering in Bandon Oregon. Glad to say the first trip was a success. Traveled during the day up there knowing I would have to re-do the wiring for the lights while I was there. Check the photo below of the electrical wires before I fixed it!!!... Still things to do but isn't that the joy of having a trailer??? Found the upholstery fabric and that is next...
 |
 |
 |
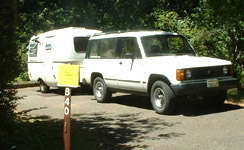 |
| ready to leave for Oregon - if it's not packed it's not going ... | this gives you an idea of what I
had to deal with! Re-wired the lights in Oregon |
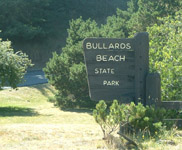
Over 100 other fiberglass RV's @ Bandon Oregon
(3 other Bolers) Lots of new friends and fun..... |
|
| Latest changes 8-04-2005 |
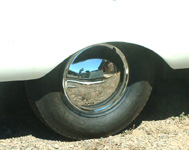
found 13" moon hubcaps online @www.mooneyesusa.com Only $62 including
the shipping!
And now the subject of Power...... I need more, want more, is there ever enough?
Seriously, the 75 watt solar panel on the roof generates enough for the fridge
and some lights but have noticed the battery level drop below 12 volts a few
times. Can re-charge with 110 between outings but don't want to have to. A
friend gave me some old solar cells that were used to make panels back in
the 70's. Looks like enough to generate another 60 watts. I am making 2 -
2 foot square panels that I can place on the ground and angle towards the
sun where I camp. This should give me a budget of over 700 watt hours a day
(fridge uses about 350)! Should be enough to use the inverter/110 system for
the micro wave if needed.
Will get them done in time for Burning Man!
| Latest changes 10-09-2005 |
I went egg hunting on my annual trip to burning man this year.
Click on this link to seethe 21 eggs I found
The Boler did great this year. I didn't use the awning that slides in the
rail on the roof because the winds got so rough last year that is trashed
the awning. I modified the poles and connectors of a free standing auto cover
and lashed a tarp to it this year. This worked great, held up fine and made
less noise.
I did cover the windows that have not been weatherproofed with plastic and
sealed off the vent for the fridge to help keep the dust out. (my fridge is
electric not gas so that works - I pulled out the drawer above the fridge
so there was some air circulation for the coil). As an extra treat I added
a baby Webber gas grill outside for cooking this year.
| Latest changes 05-15-2006 |
Been a while since I posted. I missed the Oregon gathering this year. But
did find time to find the fabric for the upholstery!

But now have to find time to do it.
Guess it will get added to the growing list along with the new solar charge
controller.....
| Post 07-12-2006 |
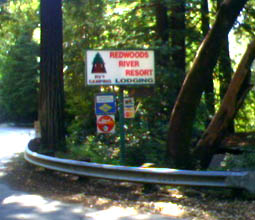
Took a trip up to the California Redwoods where I met friends for a long
weekend.
|
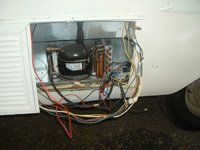
<Finally tackled the mess of a electrical system before hitting the road.
|
|
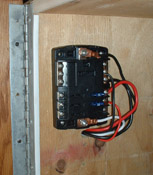 |
Then installed a new style fuse box inside the door under the front bunks. New fused lines to each major 12 volt application, fridge, lights, cd/radio and sockets for computer,etc. (still have to re-wire the lights) | 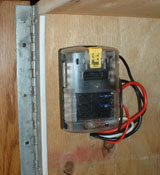 |
| Post 08-12-2006 |
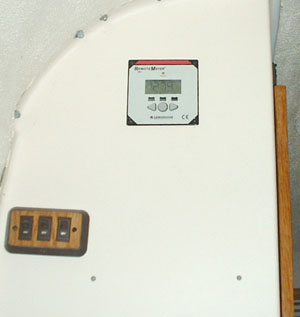
It has been a long time since I have posted but want to get back to my Boler so thought about the blog. I am getting her ready to go back to Burning man the end of the month. I have added another solar panel. The 65 watt panel on the roof just wasn't enough to run the fridge for more than a couple of days without taking the batteries too low or running a generator. I added a 120 watt panel to the system and was able to go a week in the desert and not need a generator so think I have enough power now. I have removed the original panel from the roof and will mount it on the roof rack of my tug next to the new panel so I can park the trailer in the shade ( or under my shade structure) and keep the panels in the sun. Also got a new solar charge controller with a meter mounted on the side of the cabinet above the light switches to keep a better eye on things as they happen. It gives current charge rate in amps, and amp hours since last reset & battery condition, current voltage level and high and low voltage since last reset. and temperature info too.
I do need to repair the original roof vent the the previous owner ruined with
he added the panel over it. He took off the top and the crank mechanism but
left the 4 sides going up and they look like they are not damaged. I will post
on the web sight looking for one of the original vents thinking someone might
have one laying around after installing a fantastic fan vent or something...
If none to be found I will have to cut out the old one and install one of
the new plastic ones. ( the lid of those will not fit my four sides).
|
<Finally tackled the mess of a electrical system before hitting the road.
|
|
|
Then installed a new style fuse box inside the door under the front bunks. New fused lines to each major 12 volt application, fridge, lights, cd/radio and sockets for computer,etc. (still have to re-wire the lights) | |
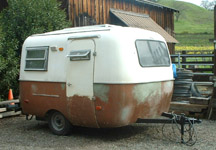
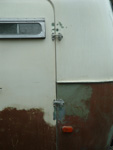
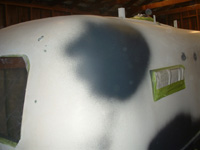
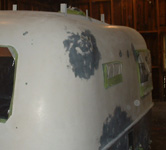
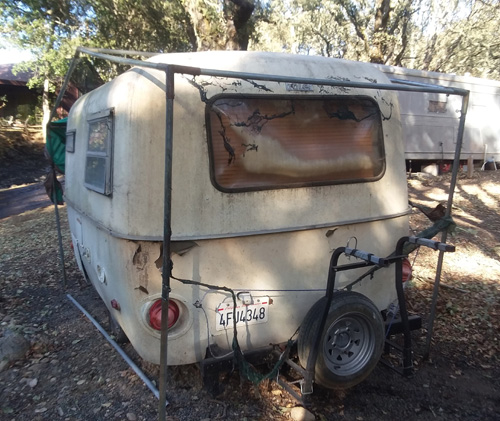
| Post 01-13-2021 |
It has been years since I have been able to get out in my trailer and blog. (Was taking time off to care for my elders, one made it 104!)
While I was off the road the Kincade fire hit and melted the back of my trailer. But our home was saved so am truly grateful since so many did not make it. But I am hopeful I will be able to pop out the plexiglas window and the fiberglass will pop back into shape? But I plan on restoring her again somehow. Look forward to getting back on the road again.
|
Low profile khaki cotton cap with back trim in the brim and Boler logo on the front. $14.50us |
| and one for the Scamp owners!
|
|
 |
|